この記事について
最近では、Git(ギット)が多くの開発現場で利用されています。これまでは、Subversion を利用していた開発現場も分散バージョン管理である git に移行しはじめています。
こちらの記事では、はじめてMacでGitを利用しようとしている方向けに、インストール方法をお伝えしたいと思います。
はじめに
まず初めに、そもそもお手持ちのMacにGitが入っているかどうか?を確認します。
以下のコマンドをターミナルで入力してみましょう※「ターミナル」は、アプリケーション>ユーティリティの中にあります。
「$」以降をコピペしてください。
$ git --version
こちらを入力して、
git version 2.5.●
などと、バージョン情報が出た場合には、既にgitのインストールは出来ていますので、インストーラーでGitをインストールするこちらの章の内容を実施して、最新版のGitをインストールしてください。
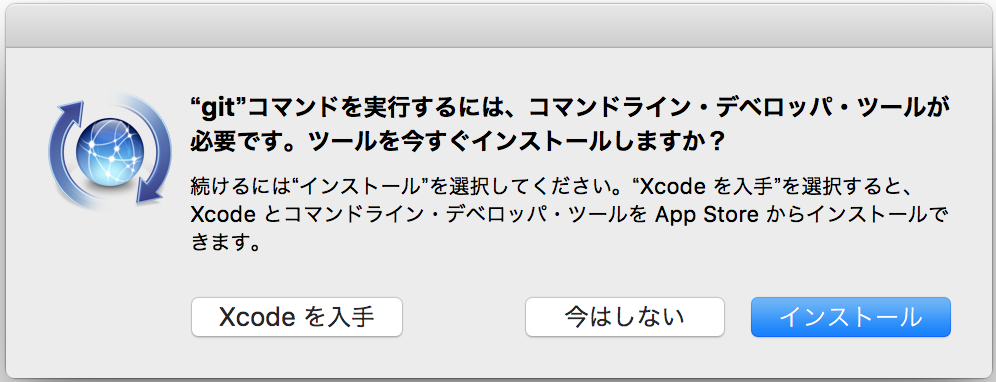
上記のようにバージョン情報が出なかった場合は、

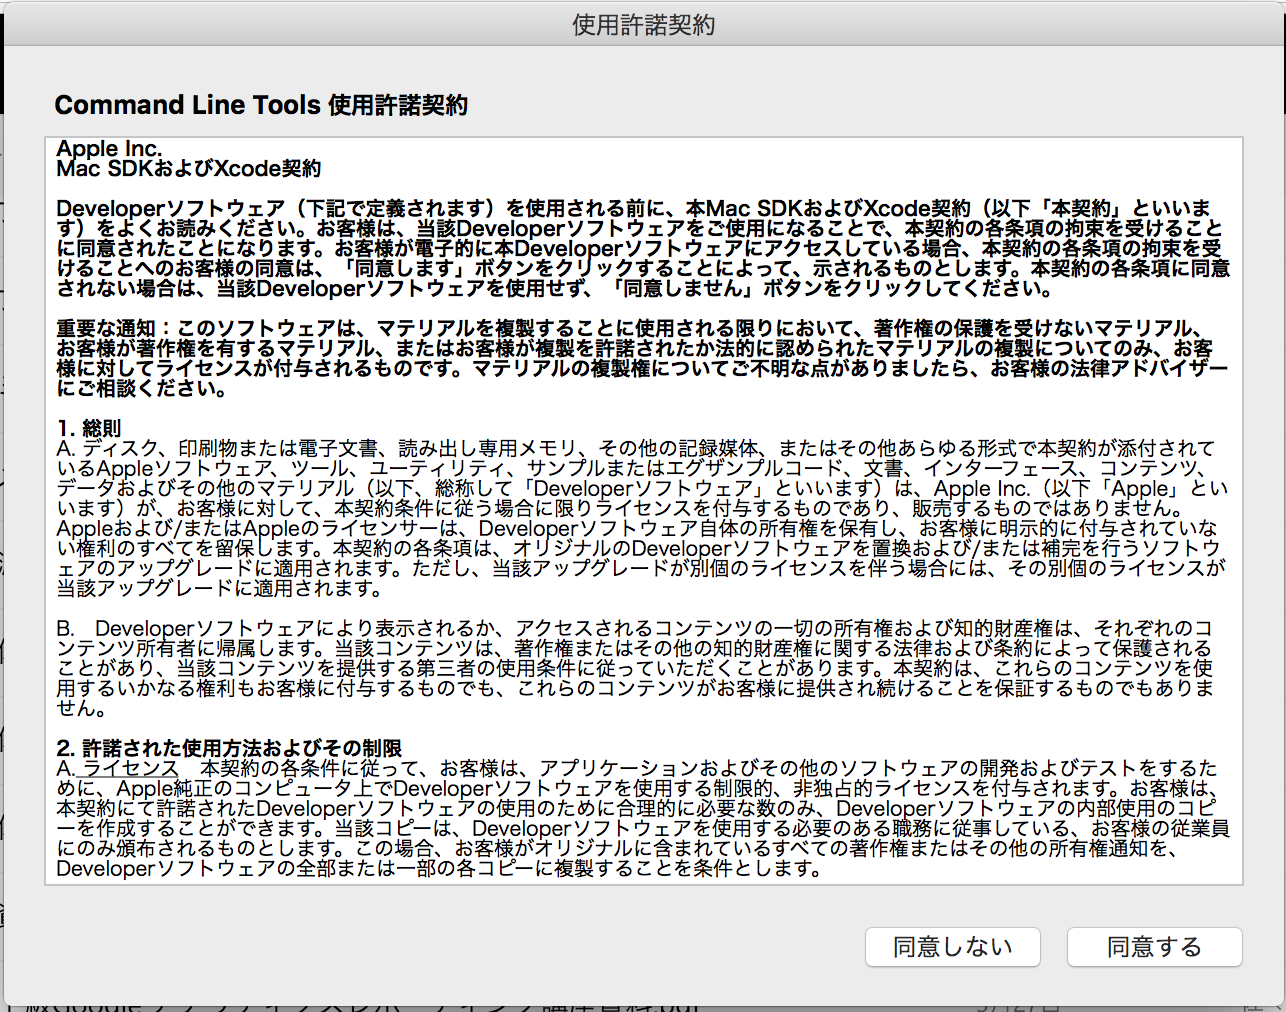
このようなポップアップが出ているかと思いますので、「インストール」をクリックして、「コマンドライン・デベロッパー・ツール」をインストールしましょう。(下記のような規約画面が出て来るので承認してください。)※xcodeを入れていただいても大丈夫です。(容量5GB必要)

ここで、改めて先程のコマンドをターミナルに入力してみましょう。
$ git --version
おそらく、バージョン情報が出たのではないでしょうか?
Mavericks (10.9)以降のバージョンであれば、’git’をターミナルから実行しようとするだけで上記のようになり、
「コマンドライン・デベロッパー・ツール」をインストールすると、Gitもインストールされます。
インストーラーでGitをインストールする
ここでは、「コマンドライン・デベロッパー・ツール」ではないやり方でインストールしたい方と、
「コマンドライン・デベロッパー・ツール」でインストールはされたけれど、最新版のGitを使いたい方に向けて、
インストーラーで最新のGitをインストールする方法をお伝えします。
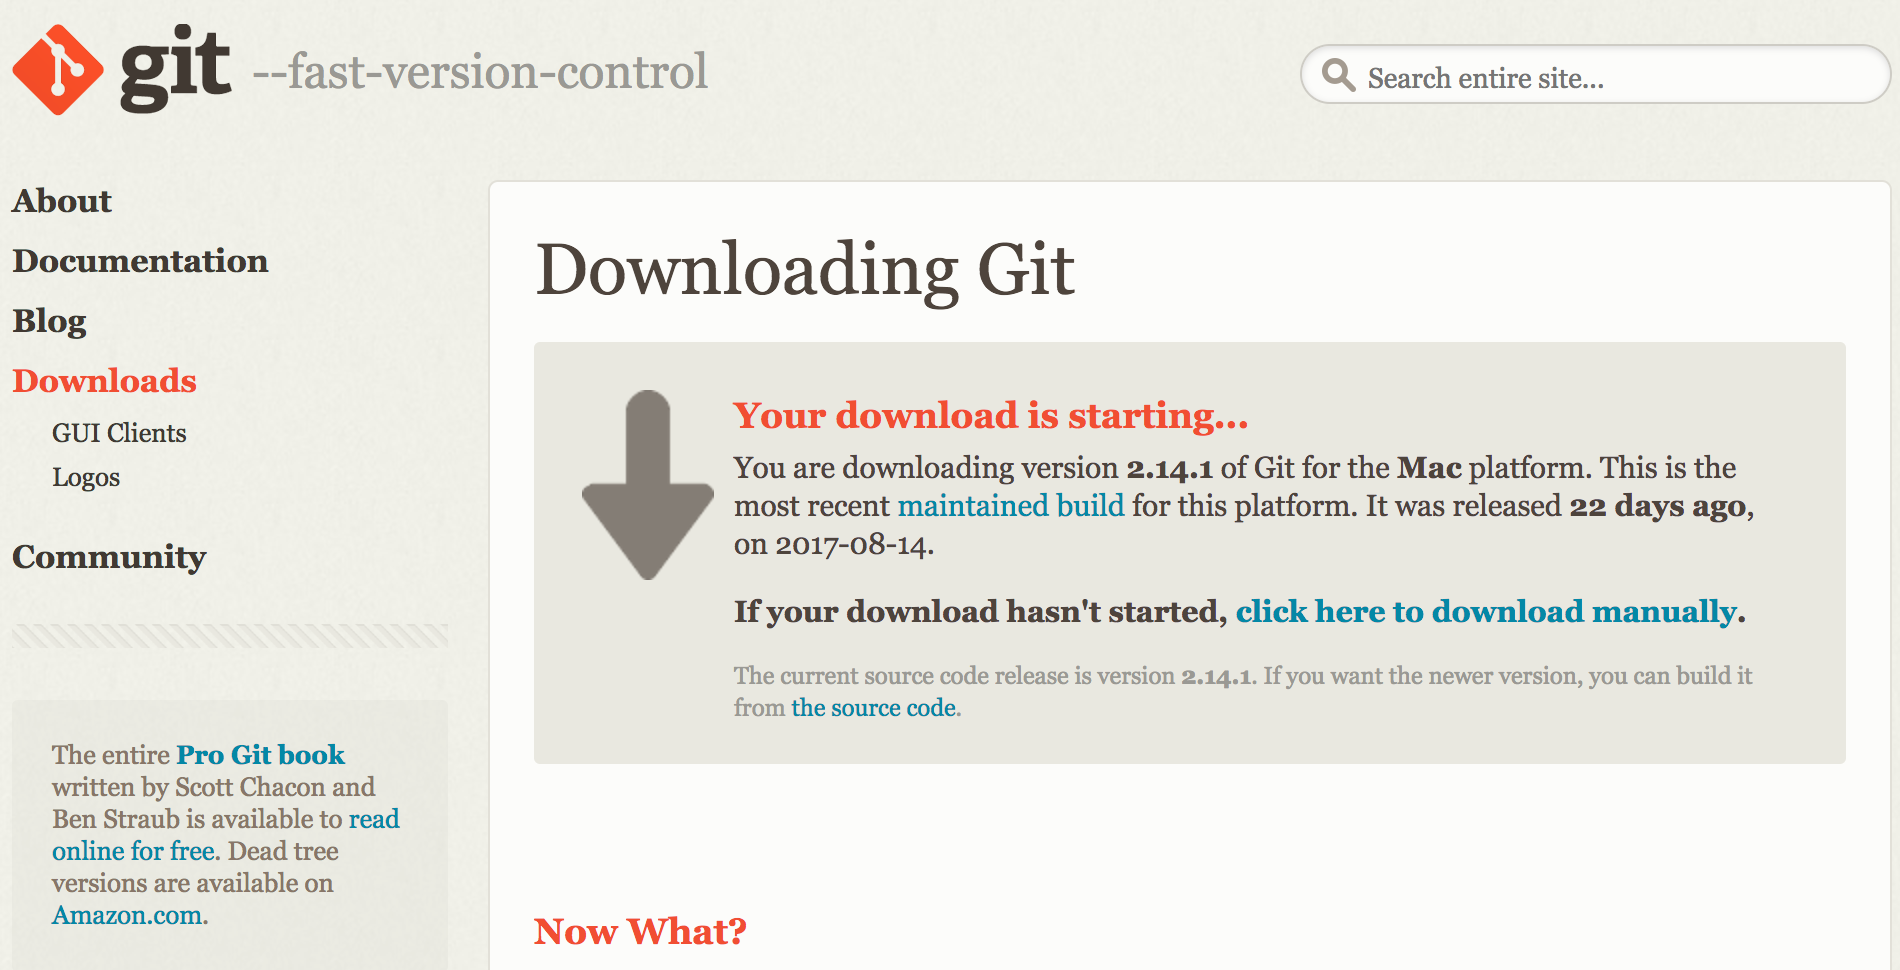
まずは、インストーラーをダウンロードしましょう。

このような画面になり、自動的にインストールが始まります。(自動的にインストールされない場合は、「click here to download manually」をクリックしてください。)
ダウンロードが完了したら、ダウンロードされたファイルを開いて、インストーラーを起動させましょう。
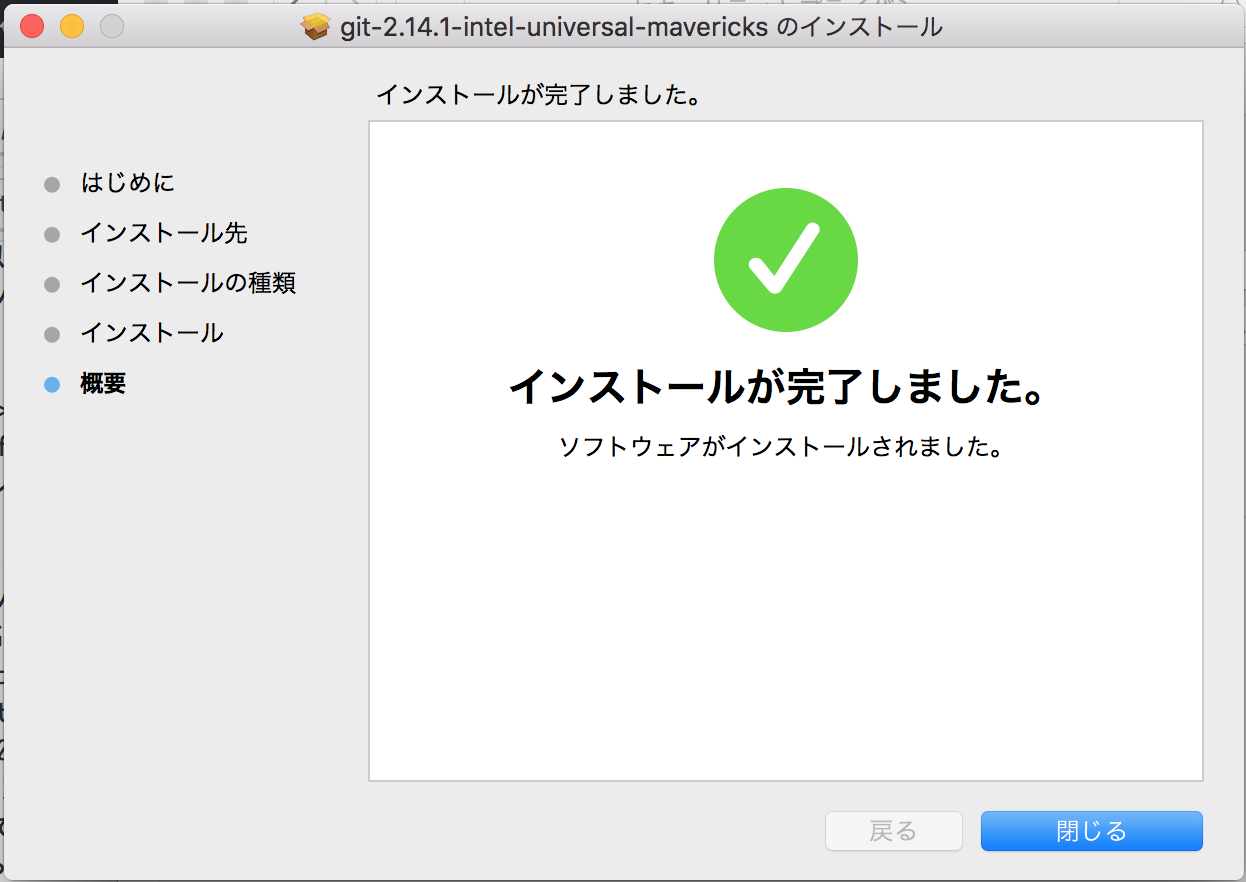
その後は、インストーラーの指示に従い、インストールを行っていきます。

これで、インストールは完了していますので、再度
$ git --version
こちらのコマンドを入力し、無事最新版のバージョン番号が出たら、アップデート完了です。
ノート
もし、上記コマンドを打っても、最新版の番号が出ない場合には、まずはターミナル、 それでもダメならMac自体を再起動してみましょう。
それでもダメな場合は、こちらを参考に、パスを確認してみてください。
Homebrewを使ってGitをインストールする
Homebrewとは
Homebrewは、macOSでのパッケージインストールを簡単にするパッケージ管理システムです。
例えば今回のように、Gitをインストールする、アップデートするなどを、インストーラーを利用するよりも簡単に実行できます。
Homebrewのインストール
まずは、先程のGitと同様、Homebrew自体がインストールされているかどうかを確認しましょう。
$ brew list
そもそも、Homebrewがインストールされていない場合は、
-bash: brew: command not found
このような返答が返ってくるでしょう。Homebrewが既にインストールされていて、リストが表示されている方は、Gitがないことを確認しておきましょう。
(Gitがリストにあれば、
$ brew update
$ brew install git
で、最新版にアップデートされます。)
以下のコマンドを入力し、Homebrewをインストールしてください。
※Homebrew公式サイトのインストールコマンドです。
$ /usr/bin/ruby -e "$(curl -fsSL https://raw.githubusercontent.com/Homebrew/install/master/install)"
==> This script will install:
/usr/local/bin/brew
/usr/local/share/doc/homebrew
/usr/local/share/man/man1/brew.1
/usr/local/share/zsh/site-functions/_brew
/usr/local/etc/bash_completion.d/brew
/usr/local/Homebrew
==> The following existing directories will be made group writable:
/usr/local/bin
/usr/local/include
/usr/local/lib
/usr/local/share
/usr/local/lib/pkgconfig
/usr/local/share/man
/usr/local/share/man/man1
/usr/local/share/man/man3
/usr/local/share/man/man5
/usr/local/share/man/man7
==> The following existing directories will have their owner set to admin:
/usr/local/bin
/usr/local/include
/usr/local/lib
/usr/local/share
/usr/local/lib/pkgconfig
/usr/local/share/man
/usr/local/share/man/man1
/usr/local/share/man/man3
/usr/local/share/man/man5
/usr/local/share/man/man7
==> The following existing directories will have their group set to admin:
/usr/local/bin
/usr/local/include
/usr/local/lib
/usr/local/share
/usr/local/lib/pkgconfig
/usr/local/share/man
/usr/local/share/man/man1
/usr/local/share/man/man3
/usr/local/share/man/man5
/usr/local/share/man/man7
==> The following new directories will be created:
/usr/local/Cellar
/usr/local/Homebrew
/usr/local/Frameworks
/usr/local/etc
/usr/local/opt
/usr/local/sbin
/usr/local/share/zsh
/usr/local/share/zsh/site-functions
/usr/local/var

Press RETURN to continue or any other key to abort
ここで一旦止まりますので、Enterを押してください。
==> /usr/bin/sudo /bin/chmod u+rwx /usr/local/bin /usr/local/include /usr/local/lib /usr/local/share /usr/local/lib/pkgconfig /usr/local/share/man /usr/local/share/man/man1 /usr/local/share/man/man3 /usr/local/share/man/man5 /usr/local/share/man/man7
Password:
==> /usr/bin/sudo /bin/chmod g+rwx /usr/local/bin /usr/local/include /usr/local/lib /usr/local/share /usr/local/lib/pkgconfig /usr/local/share/man /usr/local/share/man/man1 /usr/local/share/man/man3 /usr/local/share/man/man5 /usr/local/share/man/man7
==> /usr/bin/sudo /usr/sbin/chown admin /usr/local/bin /usr/local/include /usr/local/lib /usr/local/share /usr/local/lib/pkgconfig /usr/local/share/man /usr/local/share/man/man1 /usr/local/share/man/man3 /usr/local/share/man/man5 /usr/local/share/man/man7
==> /usr/bin/sudo /usr/bin/chgrp admin /usr/local/bin /usr/local/include /usr/local/lib /usr/local/share /usr/local/lib/pkgconfig /usr/local/share/man /usr/local/share/man/man1 /usr/local/share/man/man3 /usr/local/share/man/man5 /usr/local/share/man/man7
==> /usr/bin/sudo /bin/mkdir -p /usr/local/Cellar /usr/local/Homebrew /usr/local/Frameworks /usr/local/etc /usr/local/opt /usr/local/sbin /usr/local/share/zsh /usr/local/share/zsh/site-functions /usr/local/var
==> /usr/bin/sudo /bin/chmod g+rwx /usr/local/Cellar /usr/local/Homebrew /usr/local/Frameworks /usr/local/etc /usr/local/opt /usr/local/sbin /usr/local/share/zsh /usr/local/share/zsh/site-functions /usr/local/var
==> /usr/bin/sudo /bin/chmod 755 /usr/local/share/zsh /usr/local/share/zsh/site-functions
==> /usr/bin/sudo /usr/sbin/chown admin /usr/local/Cellar /usr/local/Homebrew /usr/local/Frameworks /usr/local/etc /usr/local/opt /usr/local/sbin /usr/local/share/zsh /usr/local/share/zsh/site-functions /usr/local/var
==> /usr/bin/sudo /usr/bin/chgrp admin /usr/local/Cellar /usr/local/Homebrew /usr/local/Frameworks /usr/local/etc /usr/local/opt /usr/local/sbin /usr/local/share/zsh /usr/local/share/zsh/site-functions /usr/local/var
==> /usr/bin/sudo /bin/mkdir -p /Users/admin/Library/Caches/Homebrew
==> /usr/bin/sudo /bin/chmod g+rwx /Users/admin/Library/Caches/Homebrew
==> /usr/bin/sudo /usr/sbin/chown admin /Users/admin/Library/Caches/Homebrew
==> /usr/bin/sudo /bin/mkdir -p /Library/Caches/Homebrew
==> /usr/bin/sudo /bin/chmod g+rwx /Library/Caches/Homebrew
==> /usr/bin/sudo /usr/sbin/chown admin /Library/Caches/Homebrew
==> Downloading and installing Homebrew...
remote: Counting objects: 7040, done.
remote: Compressing objects: 100% (4180/4180), done.
remote: Total 7040 (delta 4218), reused 4638 (delta 2642), pack-reused 0
Receiving objects: 100% (7040/7040), 3.70 MiB | 786.00 KiB/s, done.
Resolving deltas: 100% (4218/4218), done.
From https://github.com/Homebrew/brew
 * [new branch]      master     -> origin/master
 * [new tag]         0.1        -> 0.1
 * [new tag]         0.2        -> 0.2
 * [new tag]         0.3        -> 0.3
 * [new tag]         0.4        -> 0.4
 * [new tag]         0.5        -> 0.5
 * [new tag]         0.6        -> 0.6
 * [new tag]         0.7        -> 0.7
 * [new tag]         0.7.1      -> 0.7.1
 * [new tag]         0.8        -> 0.8
 * [new tag]         0.8.1      -> 0.8.1
 * [new tag]         0.9        -> 0.9
 * [new tag]         0.9.1      -> 0.9.1
 * [new tag]         0.9.2      -> 0.9.2
 * [new tag]         0.9.3      -> 0.9.3
 * [new tag]         0.9.4      -> 0.9.4
 * [new tag]         0.9.5      -> 0.9.5
 * [new tag]         0.9.8      -> 0.9.8
 * [new tag]         0.9.9      -> 0.9.9
 * [new tag]         1.0.0      -> 1.0.0
 * [new tag]         1.0.1      -> 1.0.1
 * [new tag]         1.0.2      -> 1.0.2
 * [new tag]         1.0.3      -> 1.0.3
 * [new tag]         1.0.4      -> 1.0.4
 * [new tag]         1.0.5      -> 1.0.5
 * [new tag]         1.0.6      -> 1.0.6
 * [new tag]         1.0.7      -> 1.0.7
 * [new tag]         1.0.8      -> 1.0.8
 * [new tag]         1.0.9      -> 1.0.9
 * [new tag]         1.1.0      -> 1.1.0
 * [new tag]         1.1.1      -> 1.1.1
 * [new tag]         1.1.10     -> 1.1.10
 * [new tag]         1.1.11     -> 1.1.11
 * [new tag]         1.1.12     -> 1.1.12
 * [new tag]         1.1.13     -> 1.1.13
 * [new tag]         1.1.2      -> 1.1.2
 * [new tag]         1.1.3      -> 1.1.3
 * [new tag]         1.1.4      -> 1.1.4
 * [new tag]         1.1.5      -> 1.1.5
 * [new tag]         1.1.6      -> 1.1.6
 * [new tag]         1.1.7      -> 1.1.7
 * [new tag]         1.1.8      -> 1.1.8
 * [new tag]         1.1.9      -> 1.1.9
 * [new tag]         1.2.0      -> 1.2.0
 * [new tag]         1.2.1      -> 1.2.1
 * [new tag]         1.2.2      -> 1.2.2
 * [new tag]         1.2.3      -> 1.2.3
 * [new tag]         1.2.4      -> 1.2.4
 * [new tag]         1.2.5      -> 1.2.5
 * [new tag]         1.2.6      -> 1.2.6
 * [new tag]         1.3.0      -> 1.3.0
 * [new tag]         1.3.1      -> 1.3.1
 * [new tag]         1.3.2      -> 1.3.2
HEAD is now at 5b04152 Merge pull request #3133 from MikeMcQuaid/travis-umask
==> Tapping homebrew/core
Cloning into '/usr/local/Homebrew/Library/Taps/homebrew/homebrew-core'...
remote: Counting objects: 4556, done.
remote: Compressing objects: 100% (4344/4344), done.
remote: Total 4556 (delta 36), reused 459 (delta 12), pack-reused 0
Receiving objects: 100% (4556/4556), 3.63 MiB | 233.00 KiB/s, done.
Resolving deltas: 100% (36/36), done.
Checking out files: 100% (4577/4577), done.
Tapped 4341 formulae (4,601 files, 11.3MB)
==> Cleaning up /Library/Caches/Homebrew...
==> Migrating /Library/Caches/Homebrew to /Users/admin/Library/Caches/Homebre
==> Deleting /Library/Caches/Homebrew...
Already up-to-date.
==> Installation successful!

==> Homebrew has enabled anonymous aggregate user behaviour analytics.
Read the analytics documentation (and how to opt-out) here:
  https://docs.brew.sh/Analytics.html

==> Next steps:
- Run `brew help` to get started
- Further documentation:
    https://docs.brew.sh
これで、インストールが完了しました。
brewコマンドが通るか確認してみましょう。
$ brew update
Already up-to-date.
このように、なれば問題なくインストールが完了しています。
それでは、Homebrewを使って、Gitをインストールしてみましょう。
$ brew install git
こちらを入力すると、Gitのインストールファイルのダウンロードが始まります。
==> Downloading https://homebrew.bintray.com/bottles/git-2.14.1.el_capitan.bottl
######################################################################## 100.0%
==> Pouring git-2.14.1.el_capitan.bottle.tar.gz
==> Caveats
Bash completion has been installed to:
  /usr/local/etc/bash_completion.d

zsh completions and functions have been installed to:
  /usr/local/share/zsh/site-functions

Emacs Lisp files have been installed to:
  /usr/local/share/emacs/site-lisp/git
==> Summary
🍺  /usr/local/Cellar/git/2.14.1: 1,485 files, 33.7MB
このようになれば、インストール完了です。
改めて
$ git --version
git version 2.14.1
のように、最新版(インストール時にダウンロードされたバージョン)の番号が出れば、完了です。
もともとインストールされていた旧バージョンが出てしまう場合は、こちらを参考に、
パスを通してください。
Gitのパスを確認する
ここまでの部分で、Gitのインストールは出来たはずだが、「$ git version」のコマンドを入力すると、
旧バージョンが出てしまうという方は、以下の作業を試してみてください。
$ which git
/usr/local/bin/git
このように、「$ which git」コマンドを入力すると、「$ git ●●」のように、gitコマンドを入力した時に、
どこに置いてあるファイルに記述されている命令を実行するのか?が返答されます。
※パスについて詳しくは、PATHを通すとは? (Mac OS X)(Qiita:外部サイト)を参考にしてみてください。
最新版Gitがインストールされているはずなのに、昔のバージョンが出てしまう方は、
パスを変更すると、gitコマンドを入力した時に、最新版の方のgitを実行してくれるようになります。
では、具体的にパスの通し方を説明します。
まずは、ここまでの章でインストールした最新版のGitが、どこにあるかを確認しましょう。
ヒント
筆者のMac(OS X El Capitan)の環境では、
もともとインストールされていたGitのパス 「/usr/bin/git」
インストーラーでインストールしたGitのパス 「/usr/local/bin/git」
HomebrewでインストールしたGitのパス 「/usr/local/Cellar/git/2.14.1/bin/git」
Homebrewに関しては、インストール時の最後の1行(Summary)に、どこにインストールをされたかが記載されています。
どこにあるかが確認出来たら、フルパスを入力してgit versionを実行してみましょう。
※フルパスの部分は、上のヒントを参考に調べた内容に置き換えてください。
$ /usr/local/Cellar/git/2.14.1/bin/git --version
git version 2.14.1
このように、「git –version」だけでは旧バージョンの番号が出ていたかと思いますが、
フルパスを入力してコマンド実行をすると、新しくインストールした最新版のバージョン番号が出るようになります。
それでは、パスを通して、「$git ●●」と入力するだけで最新版のGitが実行されるようにしましょう。
パスを通すには、「.bash_profile」ファイルに追記をするのですが、
そもそも、「.bash_profile」ファイルがあるかどうかを確認しましょう。
$cd ~
$ls -al
何も出ない場合は、
$touch .bash_profile
touchコマンドでファイルを作成します。
パスを通すには、下記のようなコマンドを入力します。
export PATH=$PATH:通したいPATH
例えば、もともと「/usr/bin/」で通っていたパスを
「/usr/local/bin」のパスを優先して通したいのであれば、
$ echo 'export PATH="/usr/local/bin:$PATH"' >> ~/.bash_profile
こちらの1行コマンドを入力すると、「/usr/local/bin」のパスが優先して通るようになります。
次のコマンドで、「.bash_profile」ファイルを読み込み直します。
$ source .bash_profile
これで、gitコマンドを入力した時に、新しくインストールした最新版のGitを参照してくれるようになっているはずです。
バージョン確認をしてみましょう。
$ git --version
git version 2.14.1
以上で、MacへのGitインストールの説明は終了です。
Gitがインストール出来たら、早速使ってみましょう。
Git の基礎勉強 〜Git によるバージョン管理を使う〜(コマンドラインで使う)
TortoiseGit の基礎勉強 〜TortoiseGit によるバージョン管理を使う〜(GUIで使う)
社内サーバにリモートリポジトリを作るのも一つですが、「開発にまつわる面倒事」をこの際全部、tracpath(トラックパス)に任せてみませんか?
バージョン管理サービス・プロジェクト管理サービスの「tracpath(トラックパス)」では、
ユーザー5名、リポジトリ数3つまで、無料で利用可能です。
さっそく実務でも使って見ましょう。
自らも開発を行う会社が作ったからこそ、開発チームの「作る情熱」を支える、やるべきことに集中出来るサービスになっています。
エンタープライズ利用が前提のASPサービスなので、セキュリティも強固です。
